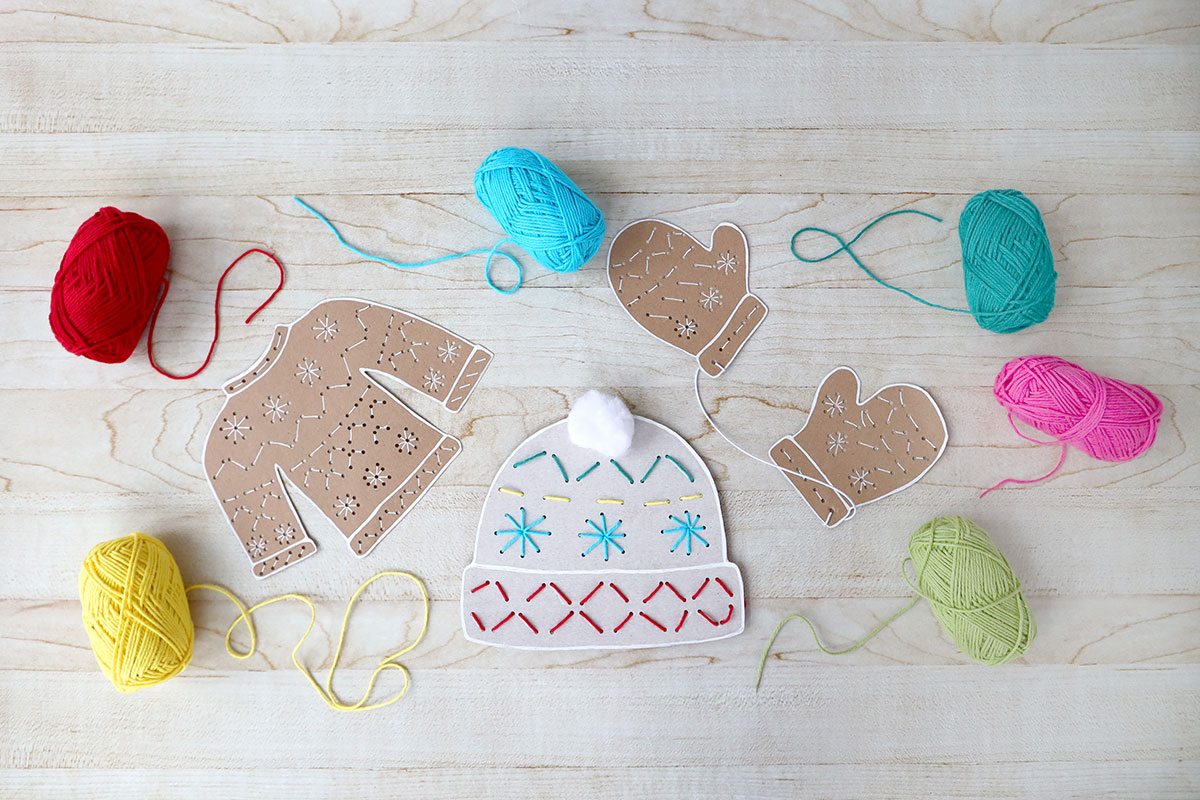
Make a quick and adorable DIY toy for toddlers to learn manual skills. Cardboard mittens, a hat, a sweater, and colorful yarn will keep your little one occupied for hours and support their fine motor skills development. Learn how to make your own threading toys for children.
What are stretching toys for children?
Threading machines are popular toys for young children that
stimulate the development of manual skills and hand-eye coordination. They are usually made of wood and consist of flat shapes, such as animals, vehicles, or letters, with holes placed in various places. Children must thread colorful yarn through the holes, creating various patterns while developing precision and dexterity. Threading machines are available in many varieties, with different shapes and difficulty levels, allowing them to be adapted to the child's age and abilities. Furthermore, because they are made of natural materials, such as wood, they are safe for children and contribute to an eco-friendly lifestyle. Threading machines are not only great fun for little ones but also an important element in their development and learning process.
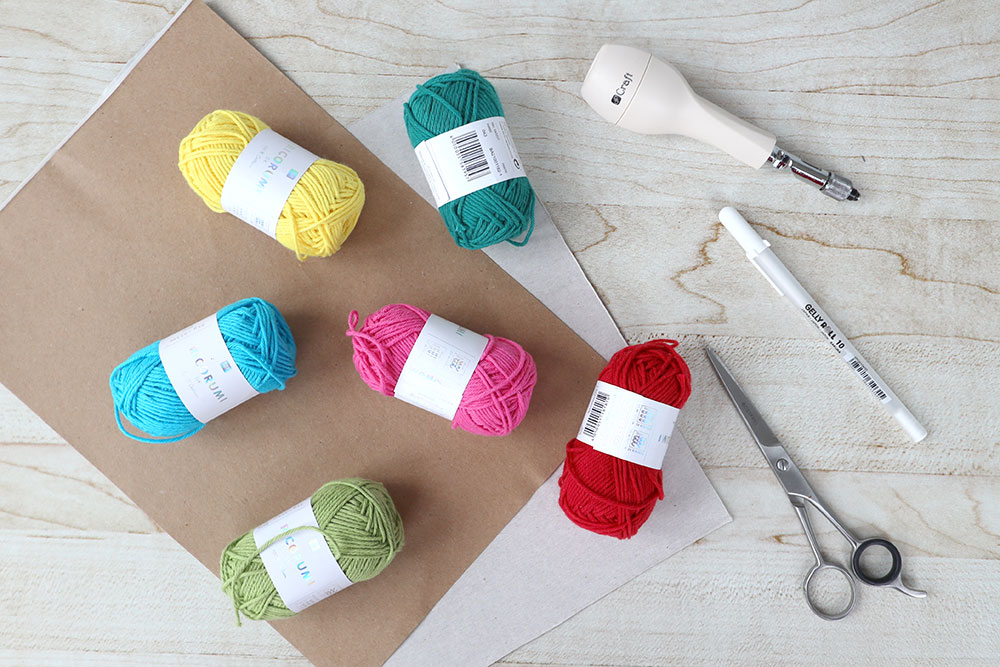
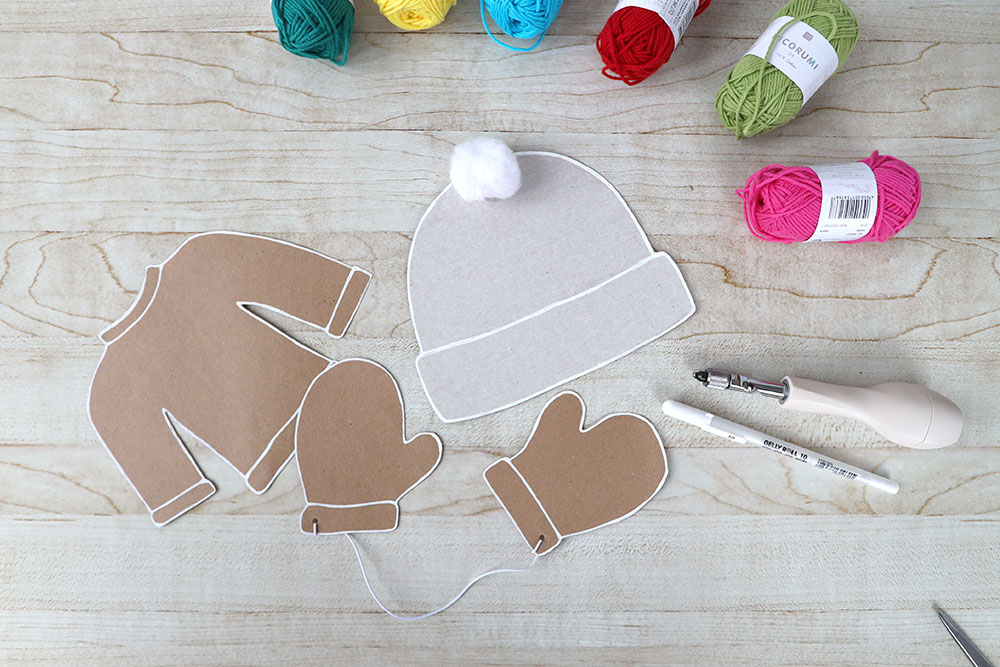
- Cardboard
- A point punch or sharp hole-making tool
- Yarn in different colors
- White marker
- Scissors
- Optionally, a pompom and a thin white elastic band or yarn
Threading games for children, pattern ideas
Children's threading toys can take on any shape from the world of a child's imagination, but also from the surrounding reality and the natural world. Our suggestion is winter clothes, but you can also create other shapes with your child, for example, by drawing on their interests.
Among the many ideas for threading toys for children, you can choose from:
- dinosaurs
- forest animals
- flowers
- portraits
- fairy tale characters
- mushrooms
- leaves
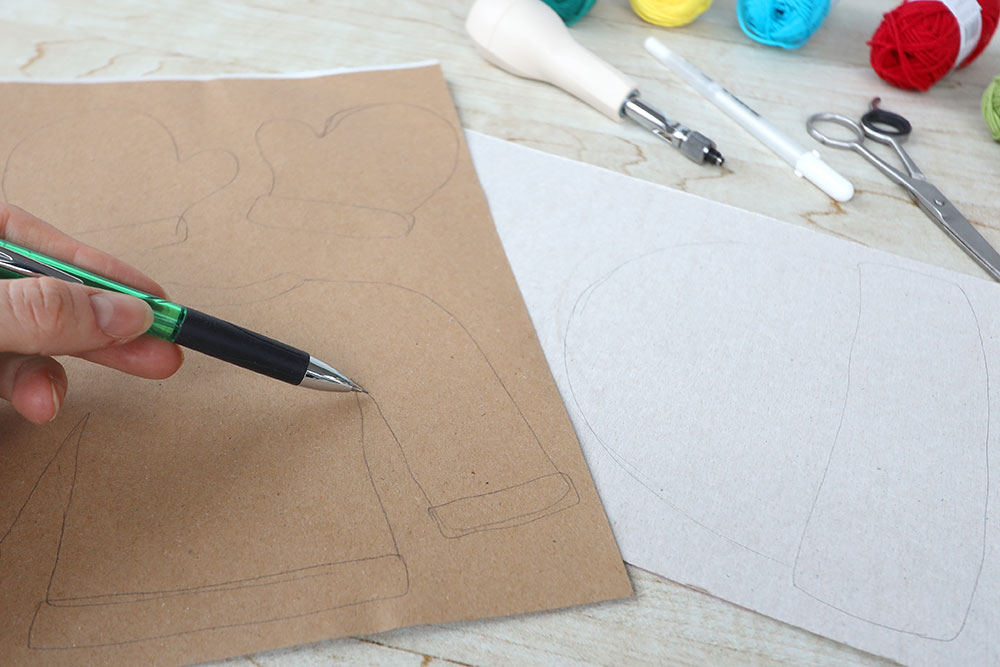
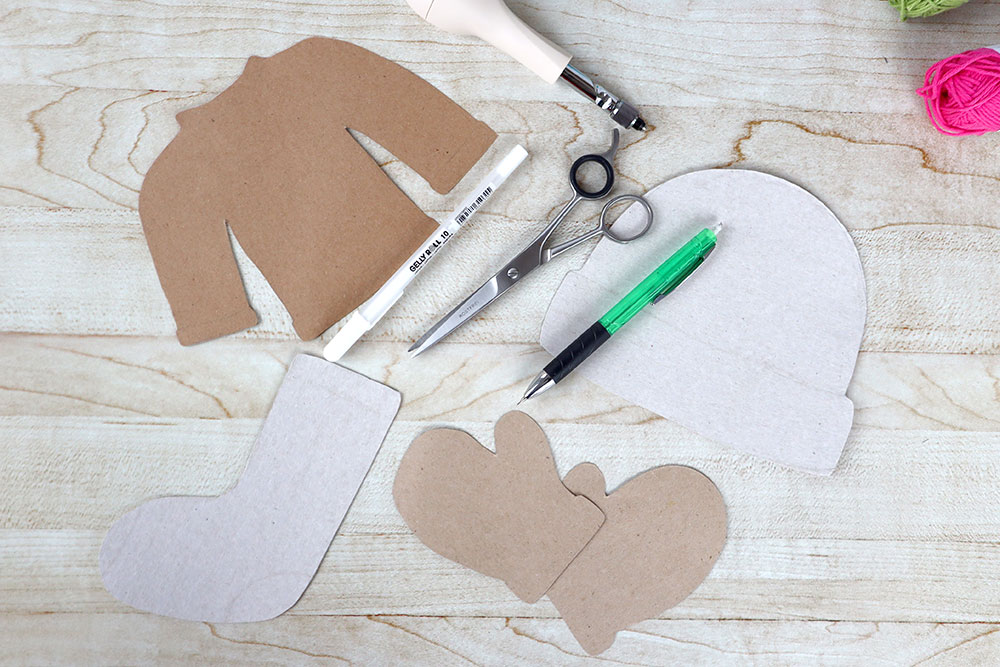
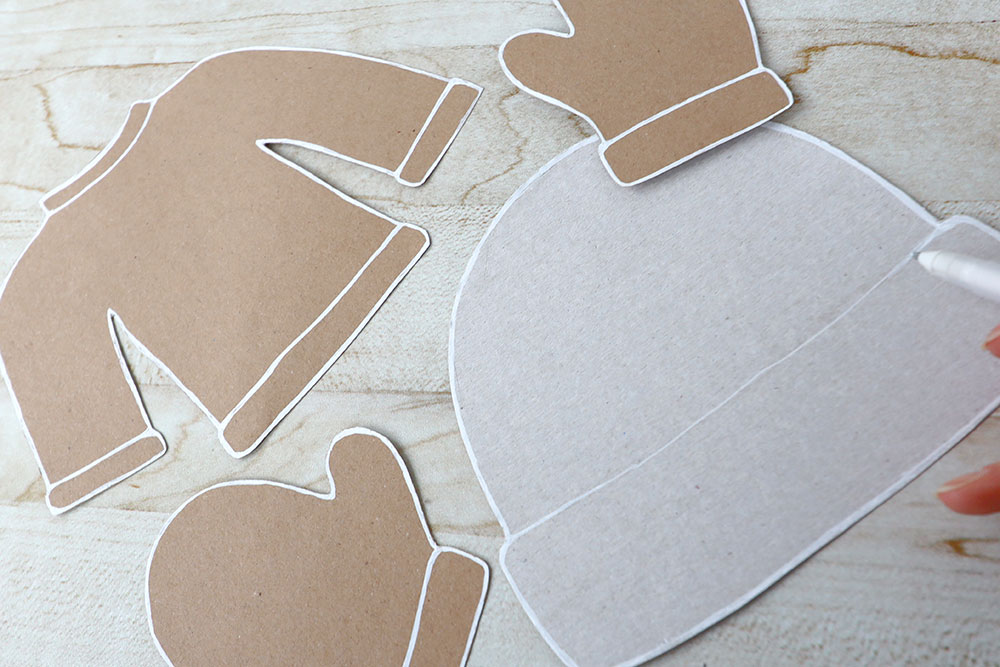
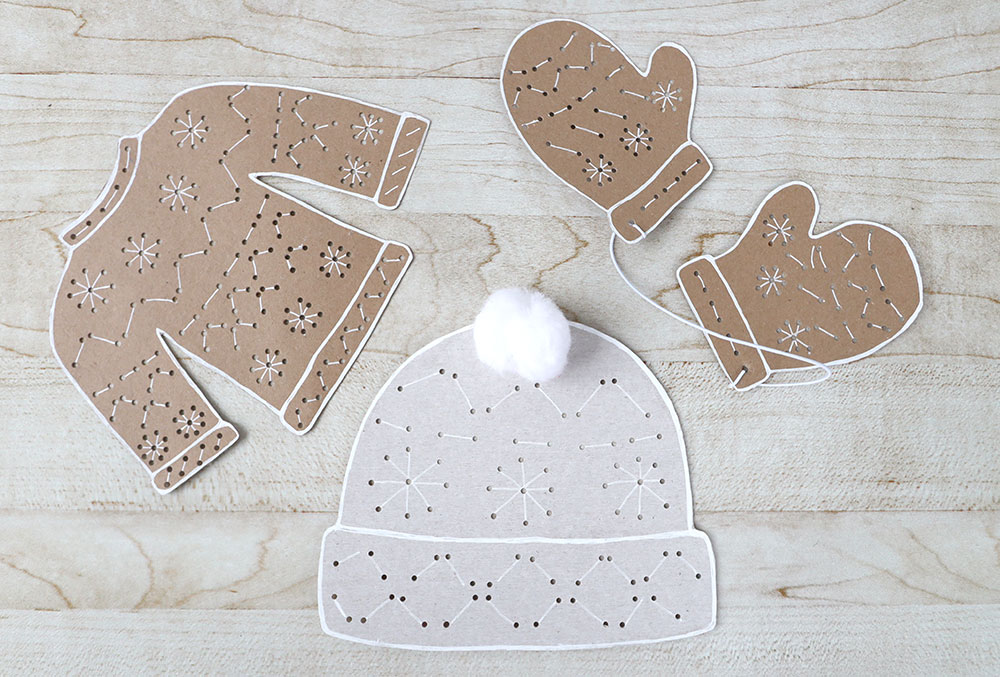
Step 1 - Drawing and Cutting Out Shapes
We draw shapes of winter clothes and accessories on cardboard – they will be the perfect base for children's yarn patterns. We decided on a sweater, hat, and winter gloves. You can also create warm winter socks or a scarf.
Step 2 - Outlining the Shape and Marking the Patterns
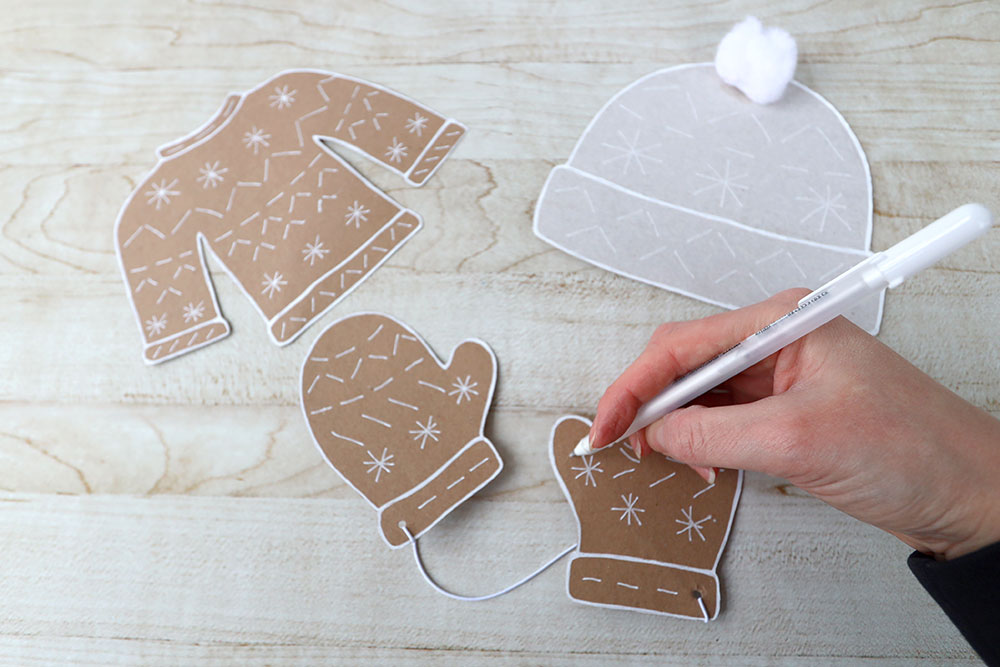
We outline the shapes with a white marker to give them a nice frame.
We can also add additional elements to the ready-made shapes, e.g. a pompom on the top of a hat, or an elastic band connecting the gloves.
On one side of the cardboard we draw patterns that will serve as a guide for children when "sewing" clothes with yarn.
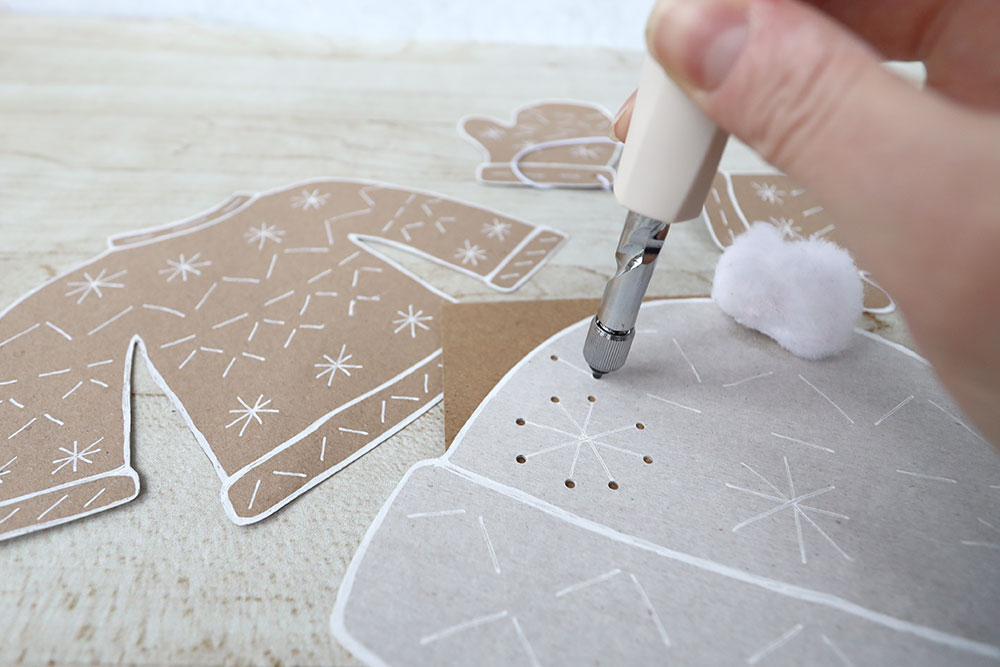
Step 3 - Making holes
In the next step, we need to punch holes at the end of each pattern we've drawn. The easiest way to do this is with a point punch.
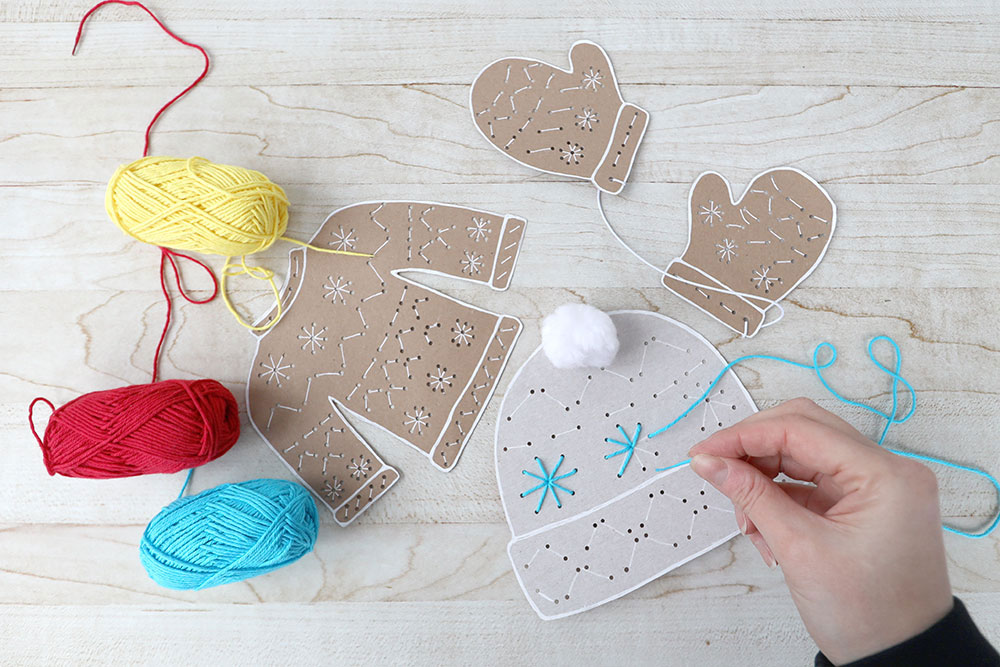
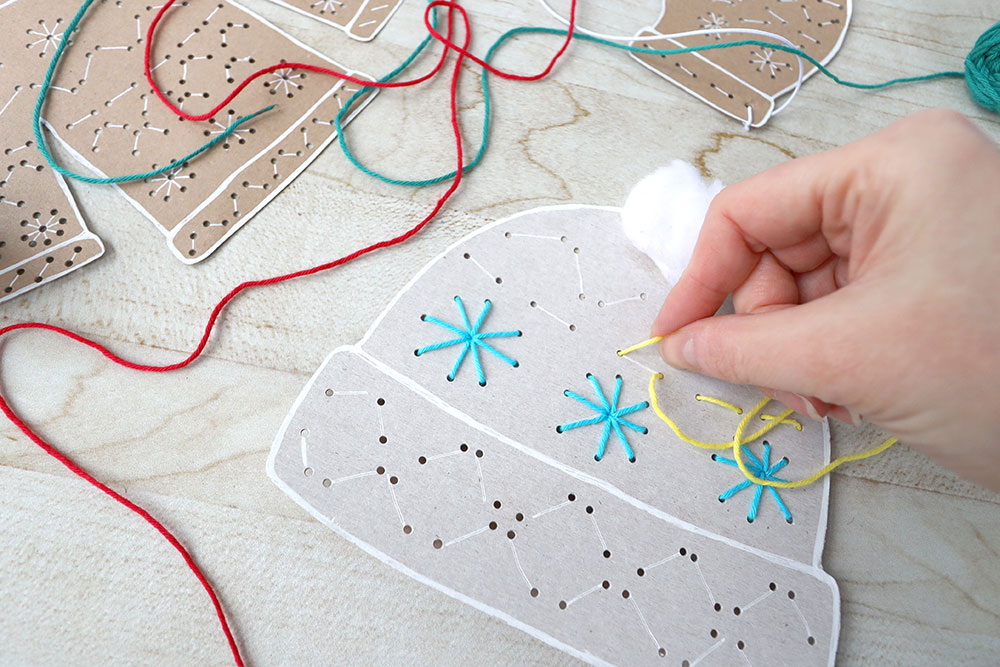
Step 4 - Threading games for children and intertwining games
Our toy is now ready. Provide your little one with a blunt cross-stitch needle and colorful yarn. Younger children can follow the drawn lines to create patterns. Older children can create their own whimsical designs using the unpainted side of the cardboard. If you don't want to give your little one a needle, you can firmly glue the end of the yarn to make it easier to thread through the hole.


Podziel się:
Japanese Crafts for Kids: Easy Projects to Make at Home
Baby skin care in winter – how to prevent dryness