
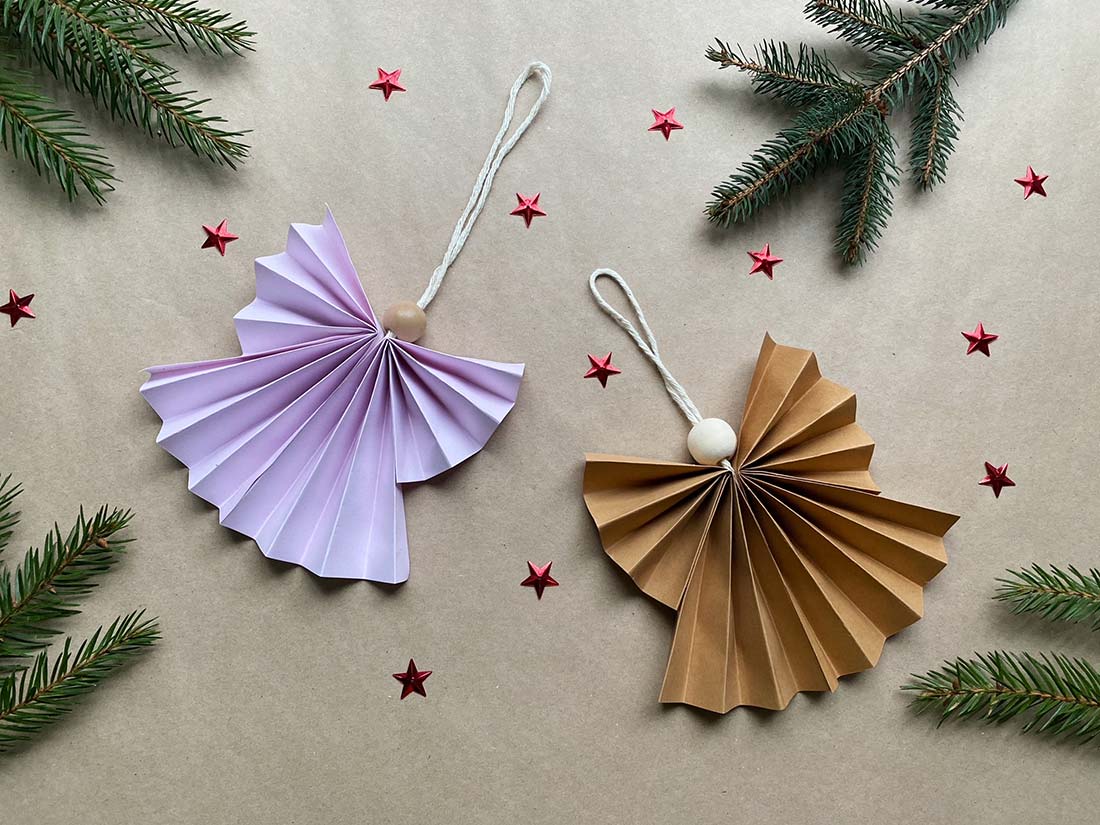
Do you like simple, delicate Christmas tree decorations? And what's more, they're easy to make with your kids? See how to make paper angels. The tutorial below will guide you step by step.
Also try these other Christmas decoration ideas:
- Christmas leaf garland – an idea for decorations made of natural materials
- DIY Christmas tree decorations – how to make paper angels?
- Christmas Crepe Paper Garland – A Simple Creative Project for Kids
- A simple DIY Christmas tree ornament – a project for toddlers
- Porcelain mass garland - step by step
- DIY Light Bulb Snowman - Zero Waste Christmas Project for Toddlers

- 2 square sheets of paper
- string
- wooden bead

STEP 1 - Fold the cards into an accordion shape
You'll need two identical sheets of paper. We used square origami paper measuring 14 cm on each side. It's best to overlap the sheets and accordion-fold them simultaneously. If you prefer a slightly larger angel with a denser accordion shape, you can use A4 sheets of paper. Cut two strips, approximately 15-16 cm wide, along the longer side. Then, proceed in the same manner, folding them accordion-fold.

STEP 2 - Forming the angel
When the accordions are ready, we fold the sheets of paper by 1/3 of their length to obtain the desired shape.


Next, it's time to glue the two parts together. Before doing so, place a folded string between them, which will serve as the pendant for our angel.
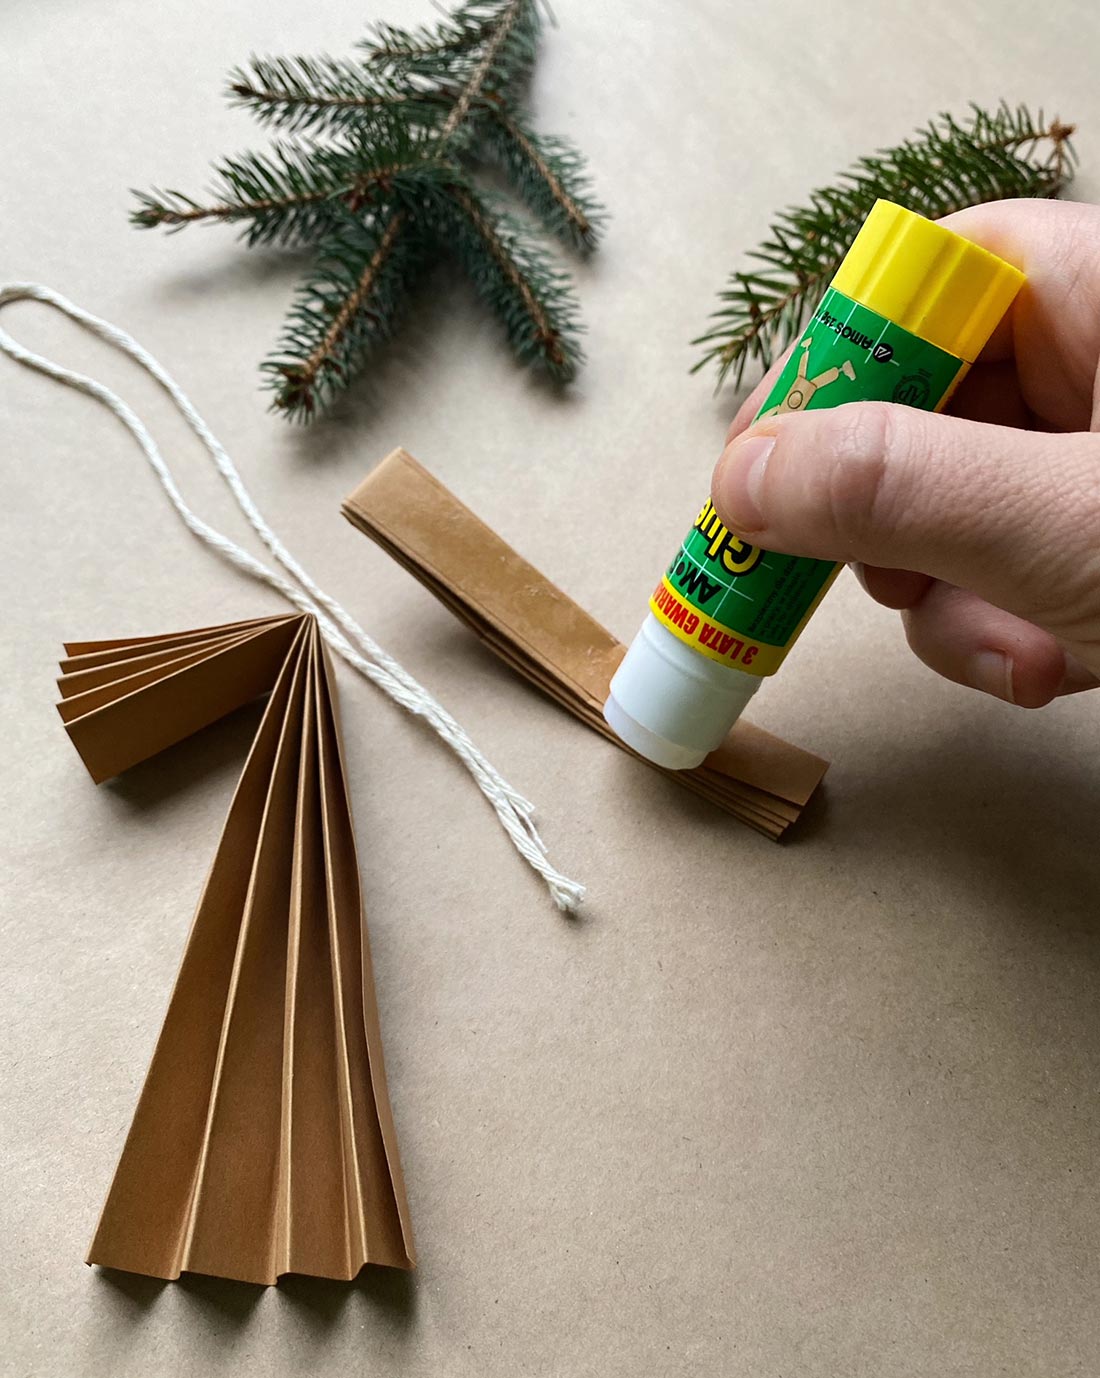

Next, we glue the shorter pieces to the longer one, i.e., the sleeves to the rest of the angel's robe. Finally, we spread the accordion more evenly to achieve the desired shape.

STEP 3 - Christmas tree decorations - the final touch
Once the angel's body is complete, simply add a wooden bead. We place it on the string, which is our angel's pendant. This gives the angel its head. This final touch, a delicate wooden detail, completes the whole and adds charm to the piece.


Podziel się:
Making Christmas baubles with little kids - DIY Christmas tree decorations
How to choose a gift for a boy for Christmas